
I'll stop now to acknowledge the abundance of caramel on my blog in recent weeks. I'd like to say that I'm sorry, but I just can't. I cannot be sorry for caramel. It's one of the most spectacular things in existence and there is no excuse for an apology. Aside from that fact, though, I also just learned how to make it, and since then I can't get enough. I've always been a caramel freak, but now that I know how flippin' simple it is to whip up, I always have some on hand. But you're not complaining, are you?
Now, back to the tart...

This tart was so completely irresistible to me that I ate half of it by myself. You heard me right. Half. And it was so wonderful that I don't even feel guilty about it! This was like a drug for me. I could feel it in the kitchen, pulling at me...calling my name. And I answered the call. I am going to have to resist making this very often, or I'll end up in a sugar coma. A deep sugar coma.
Now, here's the lowdown on this dessert. It has hazelnuts, and the need to be toasted and skinned, so you should really be forewarned:

Skinning hazelnuts is a bitch. Seriously, it's really an annoying job! It's not hard, just tedious, but it's absolutely worth it, to make this tart. Pre-toasted, skinned hazelnuts are available for purchase if you're pressed for time, but the general consensus seems to be that the flavor is better when you roast and skin them yourself.
To do so, spread the hazelnuts on a rimmed baking sheet and bake them at 350 degrees for 10 minutes. Allow them to cool for about 10 minutes before skinning them. Most people will recommend placing the hazelnuts on a towel, pulling the corners together and rubbing the sides together vigorously for quite awhile, until the majority of the skins have been removed. this has never worked for me. Ever. There is another method that I've never tried that involves boiling the nuts, which supposedly causes all of the skins to more or less fall away and apparently is more through. I haven't tried this yet, but intend to, so I'll let you know how it goes.
As it is, I actually skin my hazelnuts individually. I know this sounds insane, but honestly, it doesn't take any longer than the towel method and it's slightly more thorough. The majority of the skins just crumble off...some of the hazelnuts quite literally jump out of their skins (these are the fun hazelnuts that I love). Meanwhile, a few will stay steadfastly wrapped in their skins. Don't worry about it if you don't get every single bit of skin from every last nut. Just do the best you can. Set the nuts aside, until ready to use, while you make the dough for the tart crust.
To make the crust, you'll need unsalted butter (at room temperature), sugar, an egg yolk, all-purpose flour, cocoa powder, ad salt.
In a medium bowl, combine the flour, cocoa powder, and salt; set aside.
In a large bowl, or the bowl of a standing mixer, cream the butter and sugar together until creamy; scrape the sides of the bowl and beat in the egg yolk. Sprinkle the flour mixture into the bowl and turn the mixer on to low. Mix until the dough just comes together and is a uniform brown color. If needed, mix lightly by hand to get rid of any butter or flour clumps. Chill for 15 minutes.

Press the chilled dough into a nine inch tart pan. It's easiest when you use the heel of your hand to spread the dough out, then press it into the corners and up the sides with your thumbs. Try to get the dough as evenly spread out as you can. Chill in the freezer for 30 minutes.
Preheat oven to 350 degrees and bake the chilled tart for 30 minutes. *Remember, if you have a tart pan with a removable bottom, when handling the tart, hold it by the sides of the pan. Allow the tart shell to cool completely before filling.

While the crust is cooling, prepare the filling. To make the caramel, you need water, sugar, corn syrup, butter, heavy cream, and salt. Place the water, sugar, and corn syrup in a medium saucepan set over medium heat and stir once to combine. Bring the mixture to a boil and cook until it reaches a light honey color; remove from heat. Very carefully, add the butter, one tablespoon at a time, stirring with a wooden spoon. Next, slowly pour the cream into the mixture, being very careful (the mixture will expand rapidly and sputter). If there are any clumps in your caramel, place the pan over low heat and stir until the clumps melt.
Stir in the prepared hazelnuts and cook the mixture gently over medium heat until the caramel deepens slightly in color (a dark honey color), about two or three minutes. Pour the filling into the cooled tart shell and bake at 350 degrees for 18 to 20 minutes, or until the caramel is bubbling. Place the tart on a wire cooling rack and cool completely before decorating or serving.

Adding some semi-sweet chocolate decorations to this makes it look so lovely and elegant. You can simply drizzle melted chocolate over the top, or you can use a piping bag and writing tip to add curlicues and other designs. The design I chose to do is like a reverse shell border, but since the chocolate line is so thin, it's just pretty swirls.

For a little something extra, I also put tiny chocolate hearts in the open spaces, as well as all the way around the crust.

Isn't this such a pretty dessert? It looks so elegant sitting amongst all your favorite holiday foods too! It's the kind of dessert that you can make in no time at all, take to a holiday celebration, and everyone will be supremely impressed at your skill and dedication, even though you only spent a little time on it (not to mention how they'll rave over its yumminess)!
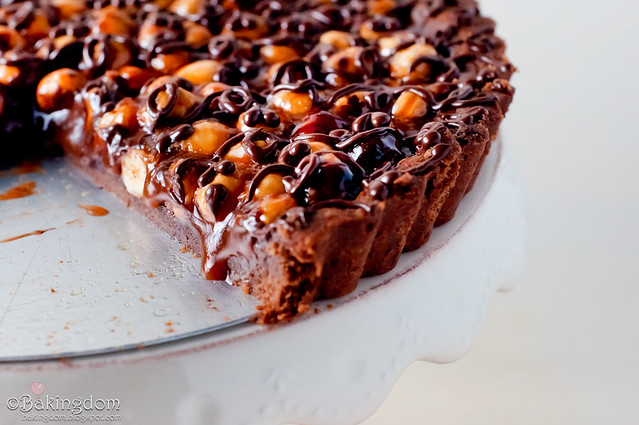
And didn't I say it had gooey caramel? It holds together perfectly for cutting and serving, but isn't hard or chewy at all. It's smooth, creamy, and perfect. This picture makes me want to go make another one. I can't even express how delicious I think this tart is!

With the exception of skinning those damned hazelnuts, this is an incredibly fast, easy dessert. Preparation and assembly only take a total of about 25 minutes, plus a 30 minute chill, and about 40 minutes total of cooking/baking (mostly hands off). You could easily have this cooling from the oven in two to two and a half hours.
Another benefit to this recipe is that each component can be made ahead of time. I toasted the hazelnuts on day one, made and baked the tart shell on day two, and made the caramel and baked the tart on day three! Plus, this is still very delicious on the second day, so you could make this the day before you plan to serve it to save even more time.
Then there's this:

Hazelnut whipped cream (made with just the lightest touch of hazelnut liqeuer) makes this absolute perfection. And if you're as obsessed with caramel as I am, I highly recommend drizzling more over the top!
We served this over a period of three days, and it was just as wonderful on the third day as the first. It's not too deeply chocolaty and the whipped cream lightens everything wonderfully. If you're a hazelnut lover, like me, this is absolutely a must-try! Enjoy!
Chocolate Caramel Hazelnut Tart
with Hazelnut Whipped Cream
Makes 1 9-inch tart
Ingredients
FOR THE CRUST
1/2 cup (1 stick) unsalted butter, at room temperature
1/3 cup sugar
1 egg yolk
1 cup all-purpose flour
2 1/2 tablespoons cocoa powder
pinch of salt
FOR THE FILLING
1 cup sugar
1/4 cup water
1 tablespoon corn syrup
1/4 cup (1/2 stick) unsalted butter, softened, cut into 4 pieces
1/2 cup heavy cream
3/4 teaspoon salt
1 1/2 cups whole hazelnuts, toasted and skinned (directions above)
1 1/2 ounces semi-sweet chocolate (for decorating
FOR THE WHIPPED CREAM
1 cup heavy cream
3 tablespoons sugar
1-2 teaspoons hazelnut liqueur (Frangelico or Kahlua)
To make the crust: In a medium bowl, combine the flour, cocoa powder, and salt; set aside.
In a large bowl, or the bowl of a standing mixer, cream the butter and sugar together until creamy; scrape the sides of the bowl and beat in the egg yolk. Sprinkle the flour mixture into the bowl and turn the mixer on to low.mix until the dough just comes together and is a uniform brown color. If needed, mix lightly by hand to get rid of any butter or flour clumps. Chill for 15 minutes.
Once chilled, press the dough into a nine inch tart pan. It's easiest when you use the heel of your hand to spread the dough out, then press it into the corners and up the sides with your thumbs. Try to get the dough as evenly spread out as you can. Chill in the freezer for 30 minutes.
Preheat oven to 350 degrees.
Bake the chilled tart for 30 minutes. *Remember, if you have a tart pan with a removable bottom, when handling the tart, hold it by the sides of the pan. Allow the tart shell to cool completely before filling.
To make the filling: Make the caramel- Place the water, sugar, and corn syrup in a medium saucepan set over medium heat and stir once to combine. Bring the mixture to a boil and cook until it reaches a light honey color; remove from heat. Stir in the salt. Very carefully, add the butter, one tablespoon at a time, stirring with a wooden spoon. Next, slowly pour the cream into the mixture, being very careful (the mixture will expand rapidly and sputter). If there are any clumps in your caramel, place the pan over low heat and stir until the clumps melt. Stir in the prepared hazelnuts and cook the mixture gently over medium heat until the caramel deepens slightly in color (a dark honey color), about two or three minutes.
Pour the filling into the cooled tart shell and bake (at 350 degrees) for 18 to 20 minutes, or until the caramel is bubbling. Place the tart on a wire cooling rack and cool completely before decorating or serving.
To make the whipped cream: In a large bowl, or the bowl of a standing mixer, whip the heavy cream on medium high speed until it starts to thicken. Reduce speed to low and sprinkle the sugar into the cream. Return mixer to medium high and continue whipping until firm peaks form. Stir in liqeuer. Refrigerate until ready to use.
Inspired by The Art and Soul of Baking , crust adapted from The Art and Soul of Baking, filling and whipped cream by Darla

18 comments:
OH MY WORD! That looks delicious!!! Can't wait to give it a try!
Oh goodness...that's gorgeous!! And never ever be sorry for caramel! But seriously - that piping - divine!
Sounds wonderful and gorgeous pics!
we learned an easy way to remove skin from nuts in pastry school. roast the nuts, pour then in a colander and rub the hazelnuts around with a paper towel. the skins fall through the holes in the colander. its super easy to remove the skin from any nut that requires skin removal. btw this tart looks awesome...I think I want to make it.
In the wise words of 'Glee', sweet grilled cheesuz. Hazelnuts, check. Chocolate, check. Caramel, check. Yup, all the requisite items are there to make the best possible desert in the world.
WOW this looks amazing! And that piping is so beautiful! Just as neat on the bottom as it is on the top. :)
But... caramel. I'm SO afraid of making caramel. Not only is it hard to make, but I'm sure I'd spill/splatter on myself (or someone else). Maybe one day when I muster up the courage, I'll try to make this.
This looks AMAZING! I think I will have to seek out some hazelnuts!!
Looks absolutely fatal!!! I'm ready to die by a fat slice!
Oh Wow!!! This is one of the most beautiful chocolatey desserts I've ever seen! It's amazing, and I'm sure that's exactly how it tastes. :)
Ohh, WANT! I gave up sugar a while ago, and I'm still trying to avoid it as much as possible, but that tart would certainly break my resolve...that caramel just oozes so seductively, and the hazelnuts look like pearls!
Absolutely GORGEOUS! I want to make this- no, I NEED to make this sometime soon...
This looks out of this world gorgeous!!!!!!! I love the final touches :) Great job!!!
This is so pretty! Yummy looking too!
I am going to try this Friday!!
The idea and the photos are JAW DROPPING amounts of awesome. <3
Fantabulous blog :)
Yum! I can't wait to try this recipe.
I made this for christmas and it was absolutely exceptional! The textures were fab, it wasnt too sweet but was completely rich, stored well and just had the all around awesomeness of being like a grown up snickers bar!
I hadn't made caramel with corn syrup before, its hard to get in australia and isnt a common item in our cooking, but it was well worth the search. The end texture and flavour of the caramel was beautiful, and i felt like the corn syrup stopped it from burning or sticking on the stove.
I expect i will make this many times more and with different nuts.
Thanks so much!!
Where did you find your tart pan? I haven't been able to find a light one.
Post a Comment